
Note: This article originally appeared July 25th, 2013 on the IndySoft Corporation Blog
a.k.a: One Incredibly Obsessive Post about Certificate Quality and File Sizes
The digital world offers us countless ways to improve efficiency and communication while also gaining valuable real estate in the form of office space. The ability to store and transfer digital certificates brings an end to the decades-old practice of maintaining walls of filing cabinets while providing almost instant access to nearly any certificate from the past with just a few clicks of a mouse. One common concern about digital storage is hard drive space. The next is making the certificate look just as good as the days when we printed them off on the laser printer on our high-end certificate paper.
If your calibration certificate templates are not optimized in the design phase you may eventually find your filing cabinets replaced by an ever growing hard drive on your server. To be clear, growth of a database can be a positive sign. Uncontrolled growth however is what we need to keep an eye on. Today’s post is an in-depth tutorial for ensuring your calibration certificate template sizes don’t get out of hand. This post is intended to educate you on what you can do to have a great looking calibration certificate templates without a lot of storage space.
Rendered Documents vs. Merged Views
IndySoft standardizes on creation of a fixed PDF certificate which is then stored in the database alongside the historical calibration record and associated data. IndySoft chose to store final certificates as fixed PDFs in the database for the reason of nearly-absolute risk avoidance. Short of a catastrophic event against your database (you do back up your database including rotation and offsite copies right?) creation and direct storage offers protection against manipulation, data loss and file corruption while maintaining maximum portability options.
I will occasionally see queries regarding concerns about database file size… sometimes in relation to database speed. To quickly put this to rest, database size has little to nothing to do with speed on a properly constructed and indexed database. To be even more specific, certificate size has no bearing on the database speed either. Why you should care about file size though is simply to minimize download times for email and web based delivery while keeping your drive growth at a reasonable rate parallel to your ongoing business needs.
Before We Begin…
Pick any asset and a related calibration from your database that best represents your most common certificate. Right mouse click that certificate and choose to save to file.
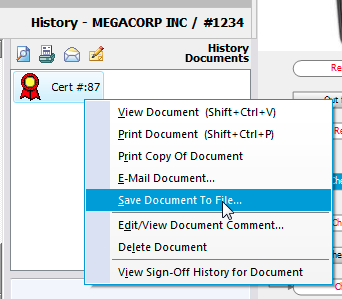
Saving a Certificate To File
Right mouse click the file from the OS then select properties.

Note the size of the file on disc.

Viewing The File Size of The Certificate of Calibration
Is it 30k? 100k? 500k? Is it over a Megabyte (egads!)? There is no absolute on what an appropriate size for a certificate should be but generally speaking a one-page certificate with a company logo and no additional images falls within the 22-50k file size range. If it’s 100k or more, or you are within the limits but your images look “rough” you can probably benefit from this post.
A Quick Lesson in Image Formats
Let’s start by taking a look at the all-important company logo that appears on every certificate. Here is the one I knocked out for this tutorial.

We Do Good Work… Give Us A Ring
The biggest things I see done incorrectly when it comes to logos and certificates are either (a) importing an inappropriately huge image then stretching it down to the desired print size or (b) importing some random logo snagged off the corporate website. Most often the logo either comes from a graphic designer who has provided letterhead or business cards and has given you a resolution generally reserved for production level print jobs or you just snagged your image from a Google Image search.
A Quick Lesson on Image Resolution
Generally speaking, a fairly good image will be between 150 and 600 dpi (dots per inch) and be the exact printed size as required for the document. The choice between 150 and 600 dpi is strictly a matter of clarity in the final printed result. Take a look at these image samples:

Examples of How Resolution Influences Clarity
These logos are three inches in width. As you can see, each time we increase the dpi (or resolution as it is also called) of the image, the clarity increases. What you are looking to accomplish is the usage of a logo at a dpi that strikes a balance between clarity on screen, clarity in print, and acceptable file size given your volume of calibrations.
Image Format Selection
Another factor that affects clarity of the logo, or other images in our digital documents, is the file format. IndySoft Printbuilder supports all the common file formats such as GIF, PNG, JPG, BMP, TIF and a few vector formats as well.
There are many layers to this discussion we’ll skip but here are the basics you really need to know about the various formats. GIF will limit your color ranges while providing smaller files via a “lossless” compression routine, BMP and TIF will generally be your largest file types, and JPG can offer a great balance but if overly compressed will show glitches in your final document.

That leaves us with PNG and my choice for this article. If I didn’t have a PNG option I would use a JPG with little to no compression. PNG offers the range and clarity of a TIF or BMP while having the “lossless” compression of a GIF. In other words, it offers the best options between clarity and size.
What about Color Depth or Bits?
Color Depth or Bits on BMP, PNG, TIF and JPG really only effect image size as it pertains to certs. You don’t gain much by using higher bit images. Generally speaking a 16 or 24 bit image is typical and probably what most editing software is going to give you by default so you shouldn’t have to think about that too much. 8 bit images will probably look granular, while 32 bit images are overkill.
Selecting the Starting Image

Our 300 dpi 3 inch Wide PNG Logo
I believe a 300 dpi PNG is a great middle ground for images and what I’m using for this tutorial. It will not be too large, compress well, and will also look great on screen and a laser print. You may find 150 dpi works just as well but the final choice is up to you. I know this image was designed at 300 dpi and is 3 inches by 0.84 inches. That measurement will be important later.
Adding Your Logo to the Certificate
Before we go into the editor let’s setup the environment so we can have a live preview in our document design. Select an asset record with some calibration history then right mouse click a calibration event. Select the option to “Use This Event When Designing In Printbuilder.”

Selecting an Existing Event To Use In Printbuilder Design Mode
Now open Printbuilder from the IndySoft Home view and navigate to the certificate templates. Launch the editor for the certificate template by double-clicking it.

Launching The Certificate Template Editor
We’ll want to place the image in the certificate header so start by pulling down the Header band at the top of the template until it opens enough space for the height of your intended logo.

Sizing The Header Region For The Logo
Now click the image control on the design tab followed by a single click in the header section of the certificate to add the image control to the document.
Adding The Image Control

Right mouse click the image control and make sure Auto Size, Maintain Aspect Ratio, and Stretch are enabled then click the Picture … option. A dialog will appear for you to browse and select your image for import. Browse to select the picture then click Open to load the image.
Setting The Image Control Options

You’ll notice the image is huge. This is because we are bringing a 300 dpi image into a 96 dpi environment. It has just scaled to meet the screen dpi. Not to worry. With the image selected look at the properties for the Layout Height and Width items. Set the width to 3 inches and height to 0.84 inches (or whatever your image happens to be.)

Manually Resizing The Image
You should now be looking at the image at the appropriate size.

Properly Sized Image In The Header
Click the preview tab to take a look at your newly branded certificate. At this point I need to state that you should not trust what you see on screen… especially in the PrintBuilder preview window. Right now this image looks jagged. Things will be better when we print, or “render” the final certificate to file, but only after we optimize the output.
Setting the Output Options
Now we are going to look at some of the settings that let us control the final quality and file size of the PDF. If your report tree is not visible in PrintBuilder, enable it by selecting View ->Toolbars -> Report Tree from the top menu.
Viewing The Report Tree

Now select the topmost item in the tree labeled Report. The properties window we used when setting the image dimensions will now show the properties for our certificate design. Scroll down to the Output – File group and open the PDFSettings properties by clicking the plus sign.
Selecting The Report Node and PDF Properties
The primary settings we are interested in here are CompressionLevel, ImageCompressionLevel, and ScaleImages. You will want to turn ScaleImages off by unchecking it. Leaving this option on will default all images to the display resolution of 96 dpi and just make things look awful.

Turning Off The Scale Images Option

CompressionLevel primarily concerns compression of the text and various objects (shapes, etc) in the document. Most of my experiments have left me believing that setting this to clMax is a safe bet. It may add a slight overhead to the time spent generating the document (we’re talking milliseconds) compared to clDefault or clFastest but it will be the right call if you are looking for the smallest filesize possible. As a gut check, my experiments for a certificate using clNone, clFastest, clDefault, and clMax left me with file sizes of 62.9KB, 46.5KB, 46.0KB, and 45.9KB.

Setting The Compression Level To Max
Now we come to the ImageCompressionLevel option. This is likely defaulted to 10 and changing it depends on a few things. First, if you recall I mentioned earlier that if I was using JPG images that I would use uncompressed or lightly compressed JPGs. Here is why: Printbuilder converts and compresses your images when embedding them into the PDF and much like making a copy of a copy leads to degradation, compressing a compressed image format does the exact same thing. With JPG images you are going to want to play with this setting and test a few PDF results.
Setting The Image Compression Level

For all other image formats the rule of thumb is that the more complicated the image and/or the more colors in the image, the less compression you can use. For example with my very simple logo I can apply an image compression level of 75 before I start to see any of the edge blurriness or image artifacts appear. Every image is going to be different so from here your process is to set an ImageCompressionLevel, save the template, then go to File->Print To File -> Print To PDF.
You will be prompted for a filename. I usually save the file as CertMax10, CertFastest50, etc where I am stating the compression level and image compression levels so I can easily compare results and recall what the settings were for the clear winners in the tests. You will also want to take the resulting doc and print it to a printer for comparison in your selection process. Somewhere in between these tests you’ll hit on that perfect combination of screen and print quality with a file size you can accept for years to come. Once you find that combo simply click save and exit printbuilder.
Conclusion
This post was all about getting the most out of your digital cert generation. You learned how to pick an appropriate file size and format for your images, how to load the images and size them in your document, and finally how to optimize the output of your final PDF. We hope this post was beneficial and look forward to your feedback or questions through support or our service channels.