
Note: The following article originally appeared April 11, 2014 on the IndySoft Corporation Blog
The following assumes a level of experience with Workflow Configuration, Templates, and the Profile Manager.
Create The Initial Event
Launch into Workflow Configuration and select to create new event. Let’s name the event Equipment Purchase and we’ll want to clone this event from the CHECK-IN MULTI event so we gain access to a template-related feature later in the process.
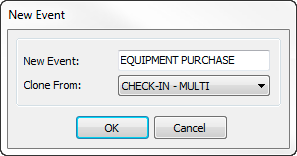
Creating The Equipment Purchase Event
Tidy Up The Event
Since we cloned an existing event, we need to clear out a few settings to optimize this new event. If you are experienced with WorkFlow Configuration you likely created a new event from an empty event like MISC. and won’t have to take these steps.
Clear the Schedule Update Rules
Navigate to step 7 and delete any schedule update rules.
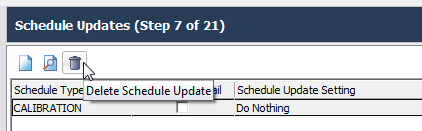
Removing The Schedule Update Rules
Clear the Equipment Selection Rules
Navigate to step 10 and purge any selection rules that may be present.
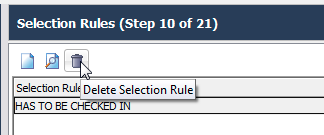
Clearing The Equipment Selection Rules
Correct any Menu Group Options
On Step 5 change the menu group option to suit your needs. Wiping out this value will place the event on the main events menu and not under a submenu.
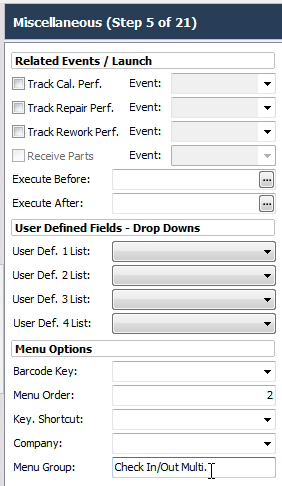
Setting The Event Menu Options
Set or Correct the Equipment Tracking Status
Since we cloned the event there is likely an equipment status update that may not reflect where we want a newly purchased asset to reside. Here I’ve changed that status to Pending Calibration because I anticipate the device may need to go to the lab or external vendor to be checked out before being pushed to production.

Updating The Event Tracking Status Option
Get Specific With Your Settings
Now that we have removed some of the original behaviours in the event, we can move on to set up our specific requirements.
Setup the Data Collection Fields
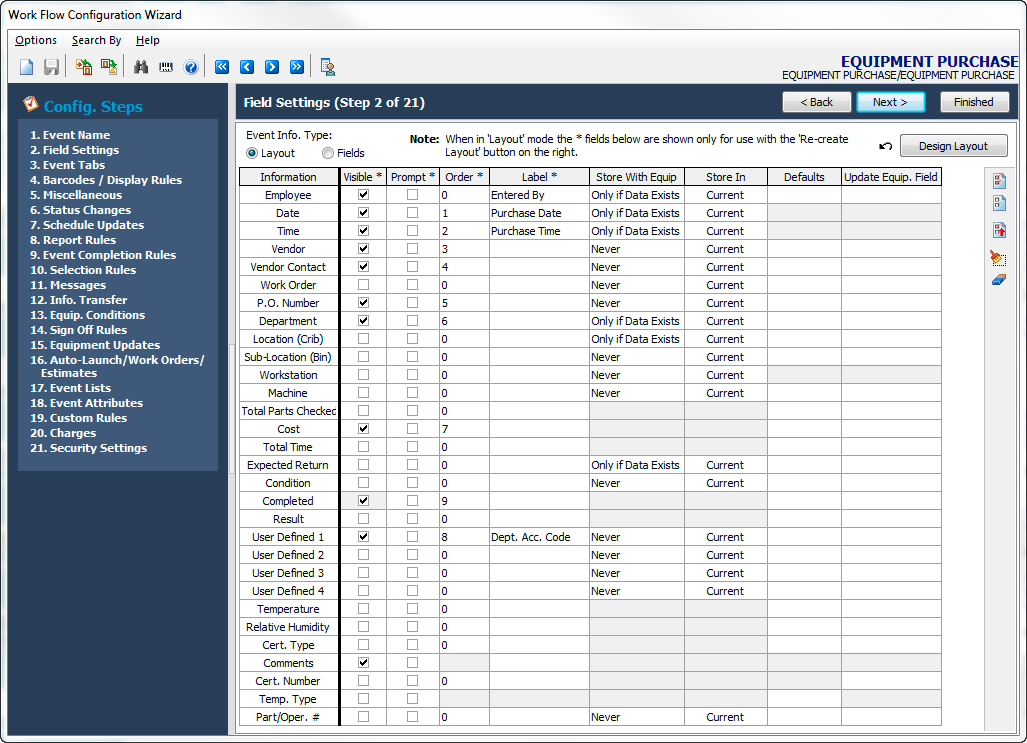
Setting The Purchase Data Collection Fields
On step one we are exposing our department, accounting code, and various other data collection fields. When you do this you’ll see the top right corner of the screen flash with a notification about updating your event layout. Simply click the arrow to update the layout with your completed field, label, and ordering information.
Setup the Document Collection Fields
Since we are dealing with purchase information, and have a paperless solution database at our disposal, let’s make the most of it by exposing the document collection panel on Step 3 followed by selecting the types of documents we want to collect or expose in the “Document Types Visible” group to the bottom right of Step 3. Then save and close the event.
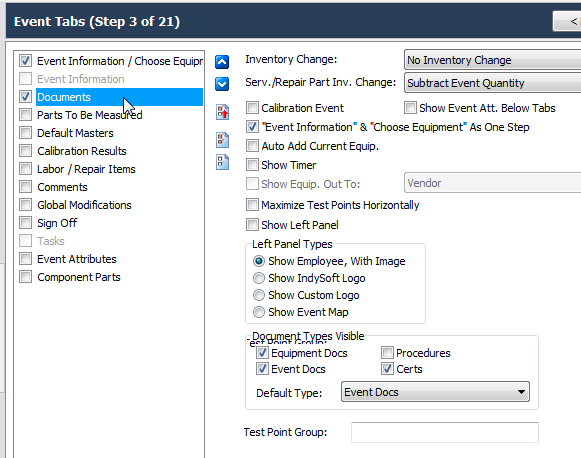
Enabling Document Collection Options
One Last Tweak
We are using a multi-asset event to track costs related to a single asset. The reason we are using a multi-asset event is because we want to be able to create the asset using the “Create Using Template” option during the event. In other words, under normal conditions you execute single asset events against assets that already exist in the database. Our goal here is to run an event which creates the asset for us during the event itself… and since the intent is to do this on one asset at a time, we have to tweak the event to forbid multiple assets from entering this point of the workflow. This is handled through a security setting.
Set the Profile Manager Option to Lock the Event for a Single Asset Only
Open Profile Manager and for any profile which will have access to the Equipment Purchase event, enable the option to “Only Allow 1 Piece of Equipment To Be Chosen” then close out of Profile Manager.
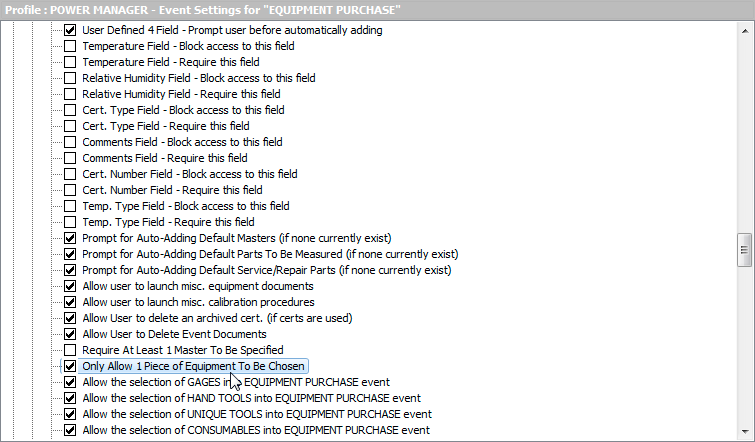
Limiting Equipment Counts in the Event
Launch The Event
Now let’s take a look at the result of the configuration. From the Events Menu you will find the Equipment Purchase event. Select that option.
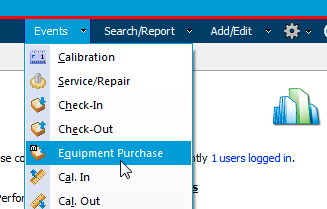
Launching The Equipment Purchase Event
Within the event select the “Add New Equipment From Template” option.

Creating New Equipment From A Template Within An Event
Select the equipment type from your list of templates then give the asset a unique identifier and if desired, a serial number then click Create.
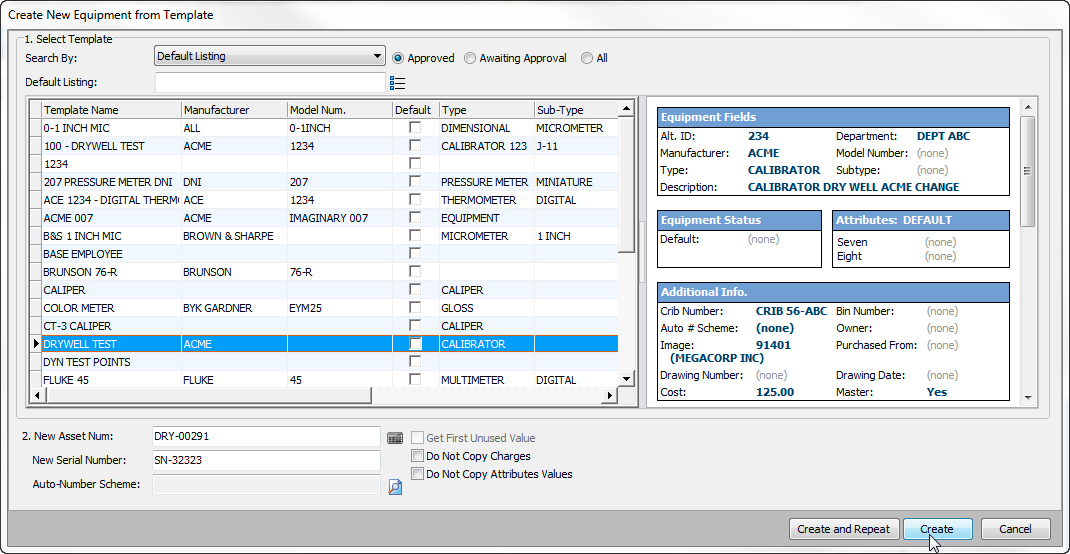
Selection of a Template
The asset will be created and loaded into the event. Now simply enter the required data in the top section of the event.
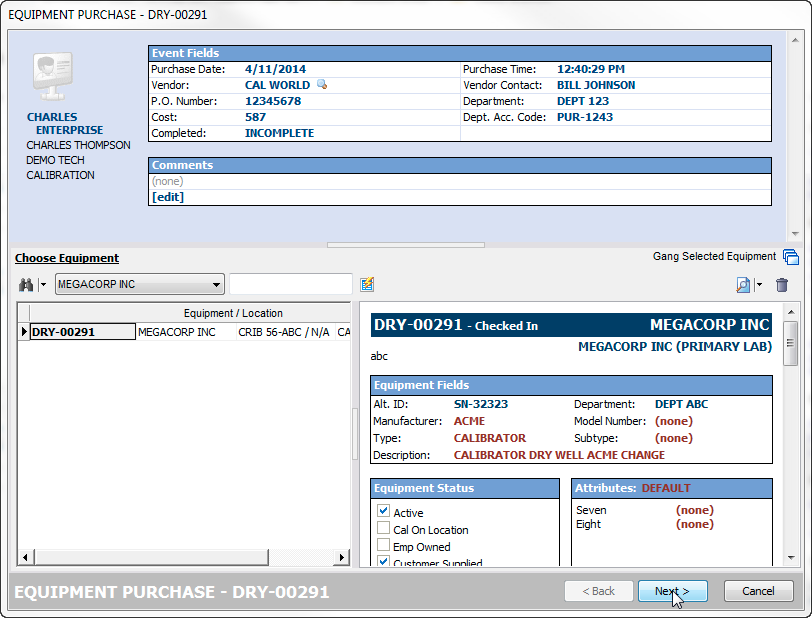
Entering Purchase Information
Clicking Next we will then be presented with the documentation panel. You can now scan or attach invoices, purchase records, shipping information into one or more files associated with the event.
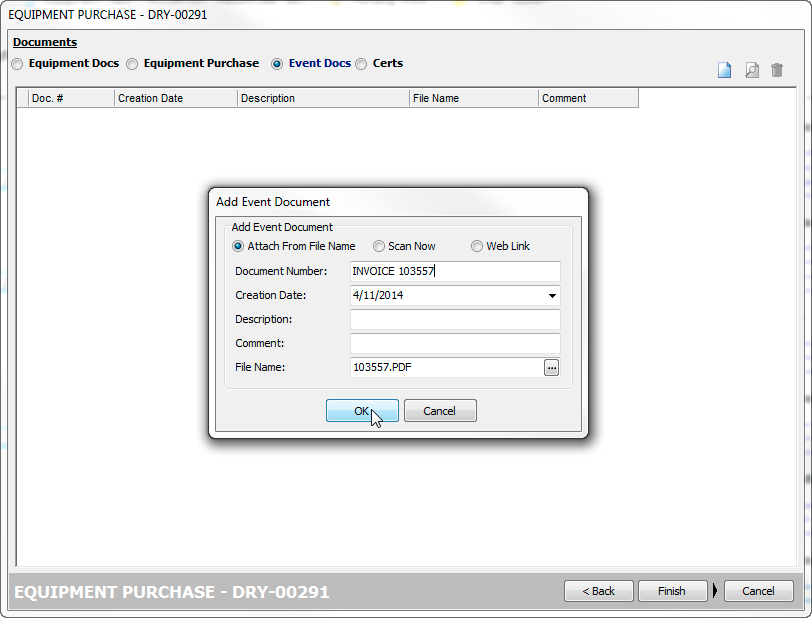
Attaching Purchase Records or Invoices
Finally, click Finish to complete the Event.
Viewing the History of the Asset
Open the equipment view for the asset that was just purchased and created. From the History panel you will see the equipment purchase event, and if selected, the scanned or attached documentation.
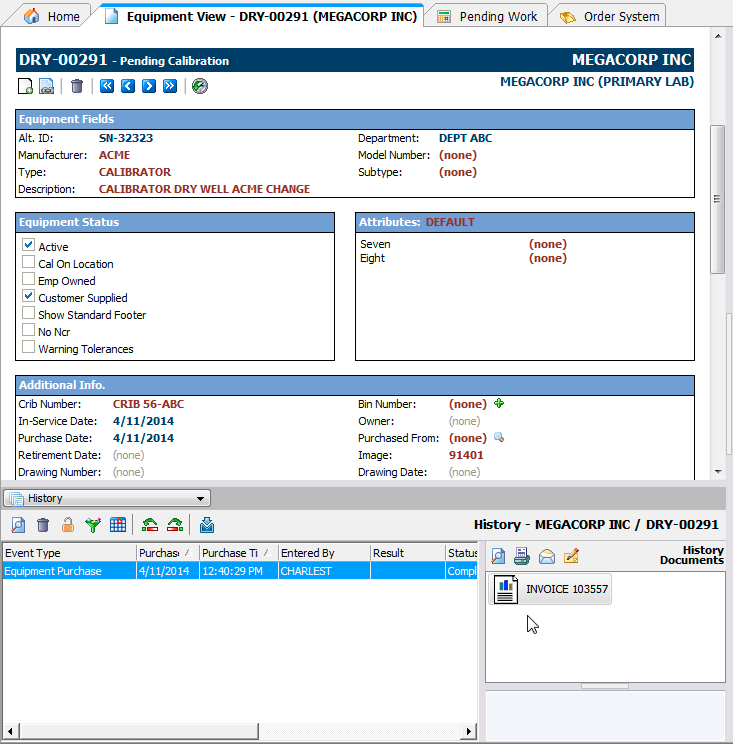
Viewing the Purchase Entry in History
We can easily drag and drop any of the additional collection fields into the history view to see the vendor, purchasing department, amount, etc.
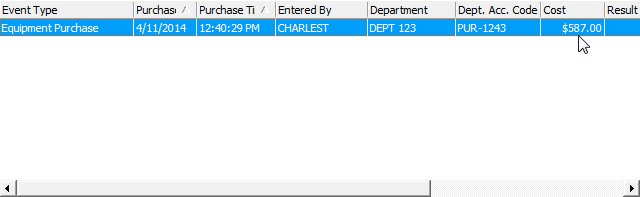
Additional Purchase Data in History
Reporting on the Data
After some time, you will build up purchase history in the system and at some point you may want to visualize or report the information related to your purchases. Opening EventFinder and creating a search filter is a quick ad-hoc way of getting to this data. Simply set the Event Type to your EQUIPMENT PURCHASE event then optionally enter any other filters related to timeframes, departments, etc. to get a results grid that can be printed as a report or exported to Excel or various other popular file types.

Unsorted Query for Purchases in EventFinder
Right mouse clicking the grid and selecting to enable the group panel will even let you logically group results by departments, purchase order numbers, or any other fields in the grid.

Grouped Query for Purchases in EventFinder
Other Thoughts on This Process
We have a simple way to record and report on the purchase of new equipment. Let’s make it even easier by creating a custom search to replace the manual process of building the EventFinder search then pin that search to the search/reports menu. Open PrintBuilder and select the General Reports option followed by clicking New in the top toolbar.
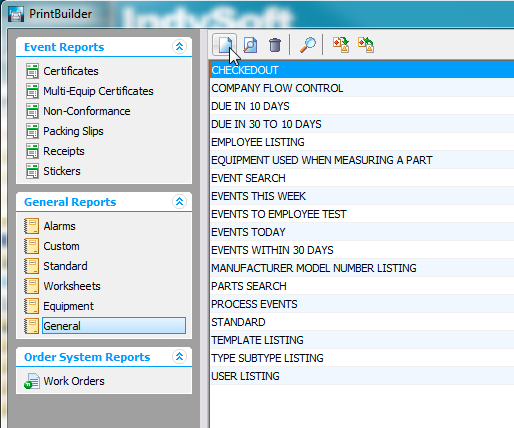
Creating a New Search in Printbuilder
Now enter a title for your search. In this example we are going to create a search to automatically generate a list of all equipment purchased within the current month. Click OK then double click the resulting report to load the search/report editor.
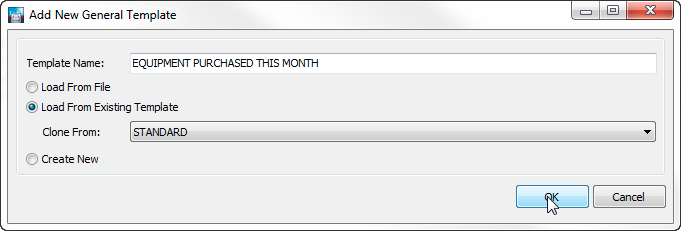
Entering the Search Name
The template will have some default search criteria already present. In the lower portion of the screen select the Additional Options so we can build the search.

Launching the Search Design View
Under Search select the Search options followed by selecting “Events” from the Search/Report Type drop down. If you want to be able to narrow the focus of a report by specific types of equipment go ahead and also check the “Extra Equip. Filter” option. Also select “Auto-Select Results Upon Launch” so the search will carry out right when you launch it. Feel free to explore the other options in this dialog which will expose options for output (File, Printer, Excel, etc).) Click OK when you are through setting up the search.

Setting Up The Search Needs
You will now see your completed search as it will appear to users. Modify any columns, grouping and sorting then click Save & Close.
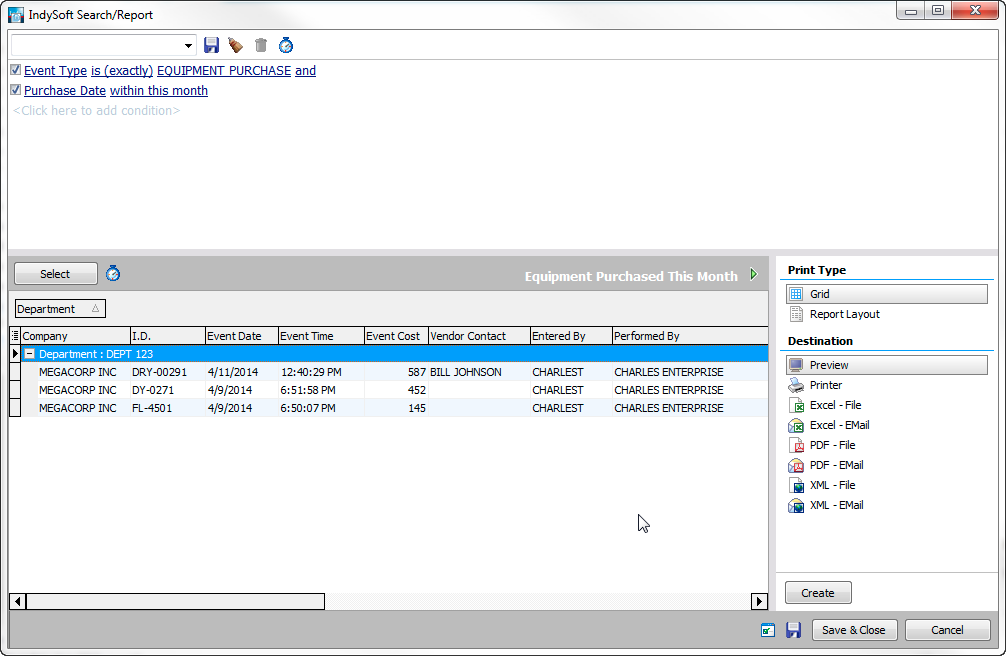
View of the Search Results and Column Setup
Our last step is to now broadcast the search out to our users. With the search template selected in the Printbuilder list, click the New icon in the lower portion of the window.
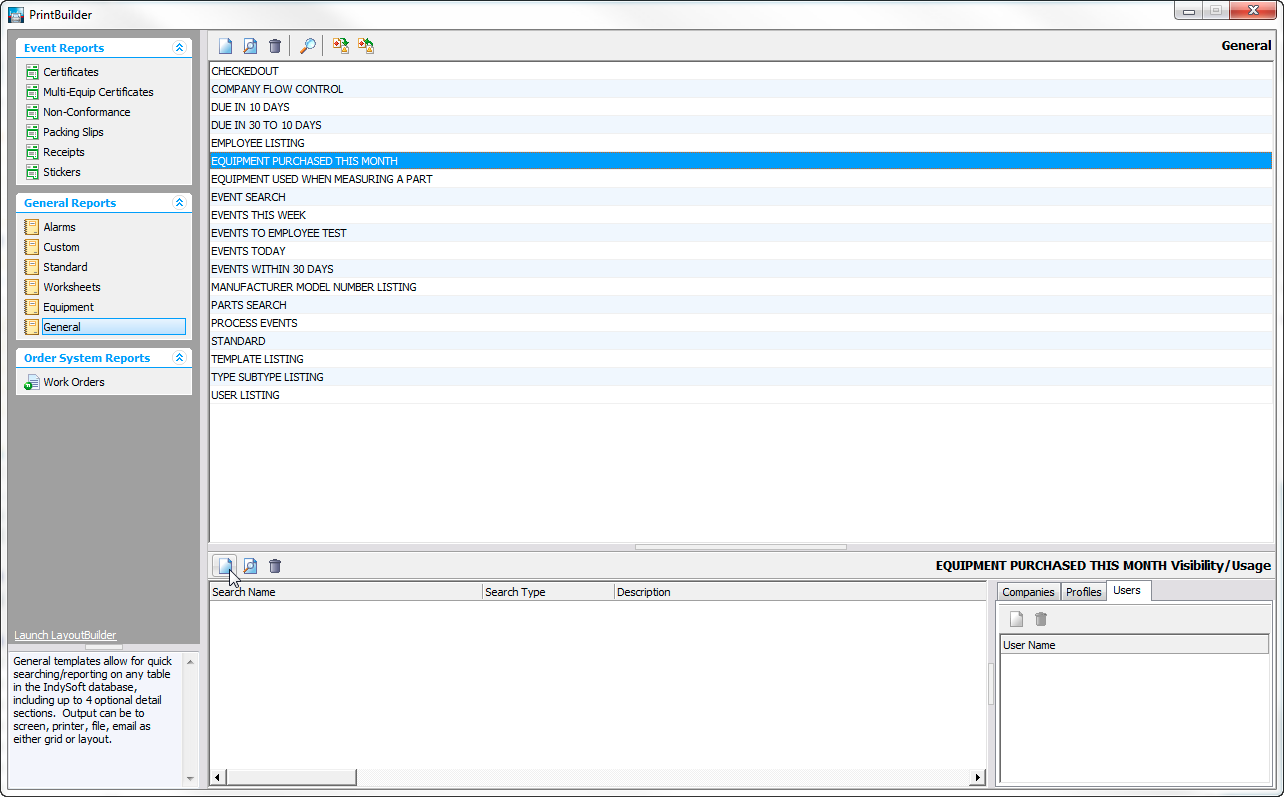
Starting the Search Visibility Process
Enter a name.menu entry for the search and set any menu group or sorting options. Setting this as a system wide search will make it available to anyone using the system. Unchecking that box will expose options in the Printbuilder screen to limit visibility/usage to companies, security profiles, or even specific users. Click OK to add the visibility rule then close Printbuilder.
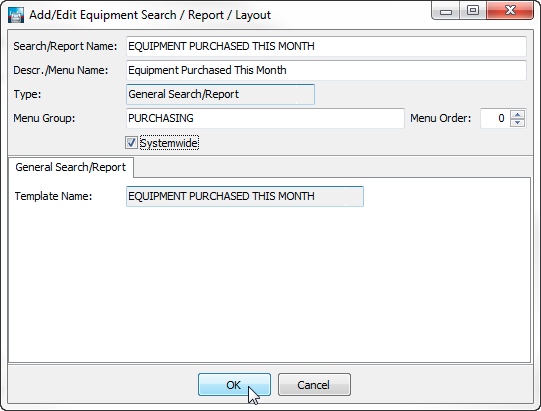
Setting the Search Visibility Options
Launching The Custom Search
You will now see your Equipment Purchase report nested in the Purchasing menu group under the search and reports menu.

Launching the Custom Search
Launching the report will give you an immediate result for the equipment purchased this month along with export options to print, report, email, or file.
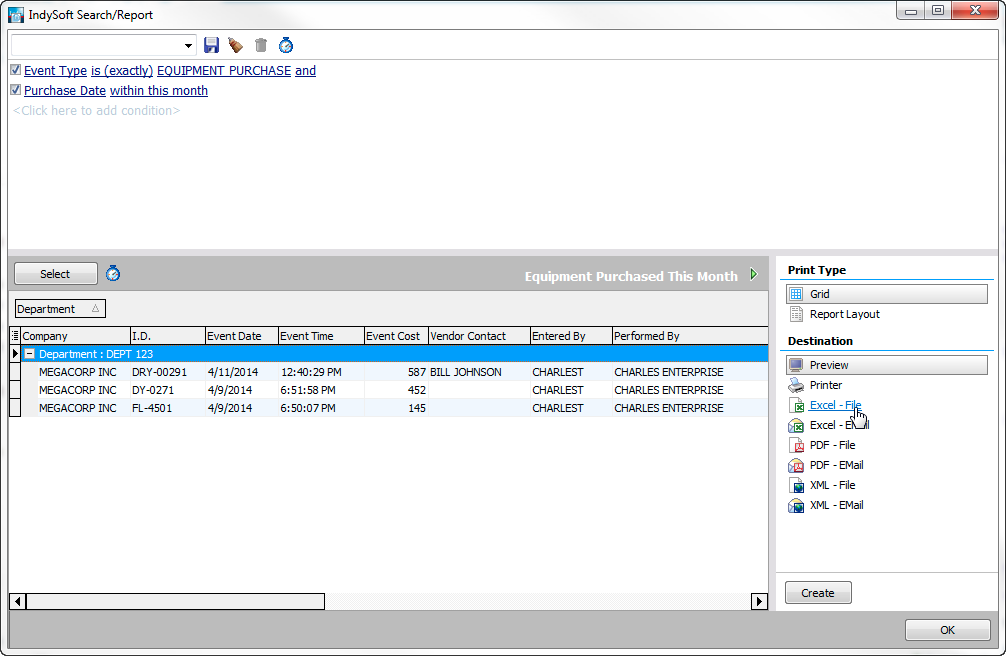
Custom Search Results
Where to Go From Here
Now that you see the fundamentals for building the custom search options you can easily craft additional reports to show items purchased this month, last month, this year, last year, between dates, and much more. The flexibility in the IndySoft workflow system and grid based reporting provides you with uncountable ways to collect and report on any type of event that happens across the time domain.
I hope you found this post beneficial. Please feel free to explore and contact your sales representative if you would like additional information on IndySoft’s training programs or consultation/service offerings that can help you find other ways to track and report on your assets as they move through your overall quality process.